Render

-
Camera - Use the dropdown menu to select a render size. Common resolutions are available in both 16:9 and 4:3 aspect ratios. If you need a specific resolution, choose "Custom" to enter your own dimensions. To adjust the width and height separately, click the lock icon to unlock the aspect ratio.
-
Render Shot - Click the large teal button at the bottom of the menu to submit a render to the queue. Once submitted, the render will appear in the Render window at the bottom of the interface. You’ll see its position in the queue, and once it starts, a percentage showing its progress.
Submitting a render won’t slow you down. Coat uses cloud-based machines to handle rendering, so you’re free to keep working on new shots without any interruption.
Render standard shot
The default render type is a standard shot, which outputs a PNG—similar to taking a photo with your phone. This render type supports resolutions up to 8K.
Render AOV shot
This render type generates multiple EXR files and a PNG file. The EXRs contain different elements called Arbitrary Output Variables (AOVs), which give you more control over the final render for compositing or retouching. This render type supports resolutions up to 4K.
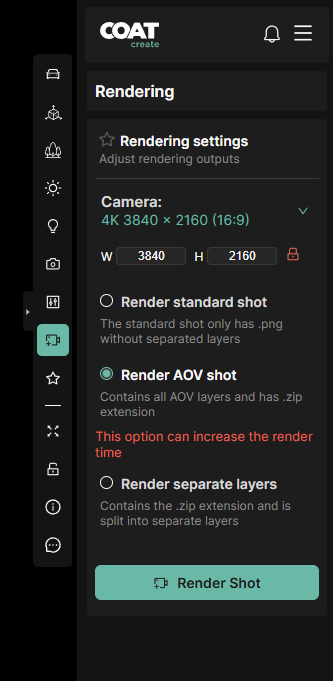
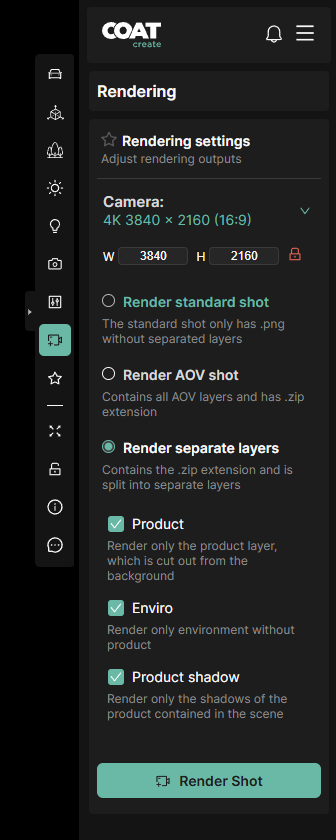
Render separate layers
This render type generates three PNG files: 1. One of the environment 2. One of the product with a pre-multiplied alpha 3. One of the product's shadow, also with a pre-multiplied alpha
This render type supports up to 8K.
- Note: We do not recommend using Render Separate Layers for interior images at this time.
Due to a limitation in the current rendering engine, transparent alpha channels are not supported. As a result, the vehicle render pass will look the same as a standard PNG render, but take longer to produce.
For now, using a standard PNG render is faster and more efficient. This feature may be supported in future updates, but there is currently no estimated timeline.
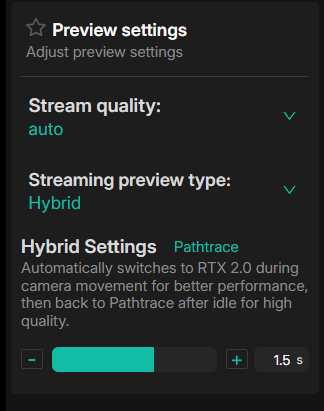
Preview Settings RTX 2.0
Preview settings determine the rendering method for the interactive streaming.
- Stream Quality
Sets the size of the image being streamed. Auto tries to set the size automatically based off your bandwidth. If you encounter a lot of lag, setting a specific size such as 720p can make for a smoother experience.
- Stream Preview Type
Sets the rendering method for the streaming session. There are 3 Options:
-
Pathtrace - This is the same renderer used for your final renderings. It is the most accurate option. Use this to dial in your final lighting.
-
RTX-2.0 - This renderer is close to pathtrace in quality but is significatly faster.It's great for blocking in your scene quickly
-
Hybrid - Uses both renderers. When interatcing with COATcreate the stream uses RTX-2.0 for high frame rates. When not interacting the renderer switches to Pathtrace to preview your final image. The hybrid settings gives you the option for the time of inaction to switch from RTX-2.0 to Pathtrace.
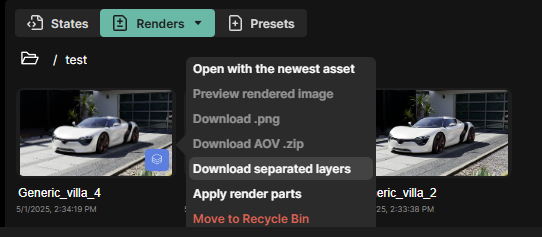
Download completed renders
Click the three bar menu in the upper right corner of it's thrumbnail and choose the option best suited to your render type. The render will be saved to your browser's download folder.
- When you download a standard render a png file will be downloaded.

- AOV renders are clearly labeled with a badge. When downloading an AOV render there will be a zip file as well as a png.

- Layered renders are also labled with a badge, they are downloaded as a zip file containg the background, product and shadow layers.